Demo Setup: Events Search – The Events Calendar
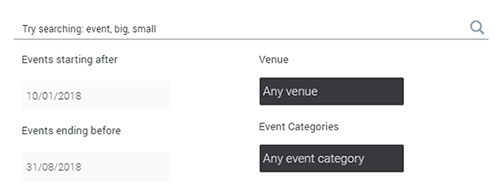
This tutorial will guide you through all the steps to re-create the Events Search Demo example when using the The Events Calendar plugin. This tutorial is also available for the Events Manager plugin users.
Prerequesites
All you need is a search instance created (working search bar). If you don’t know what that is, check out: Ajax Search Pro Documentation – Getting Started
Configuration
Follow the steps below to recreate the exact same layout as seen on the demo.
Step 1 – Choosing the Event post type to search
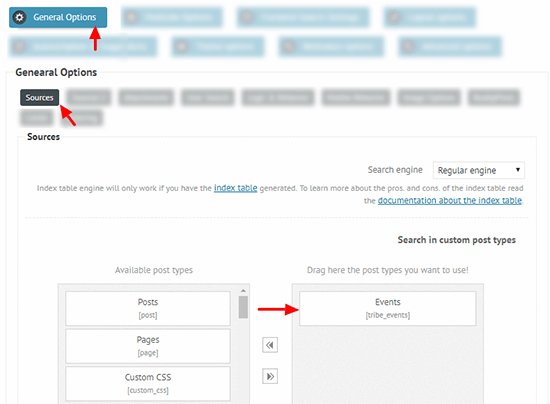
Under the General Options -> Sources panel, choose the Events (tribe_events) custom post type. In the demo setup we use nothing else, but that post type.
Step 2 (optional) – Loading the theme
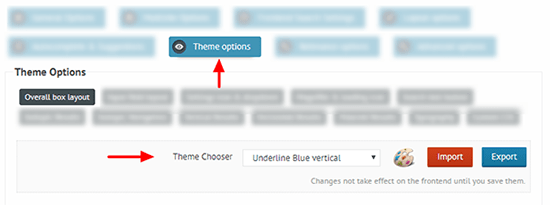
Any theme will work with this tutorial – the demo example uses the Underline Blue Vertical. To load that theme, go to the Theme Options panel and choose it from the list.
Step 3 – Filters box visibility
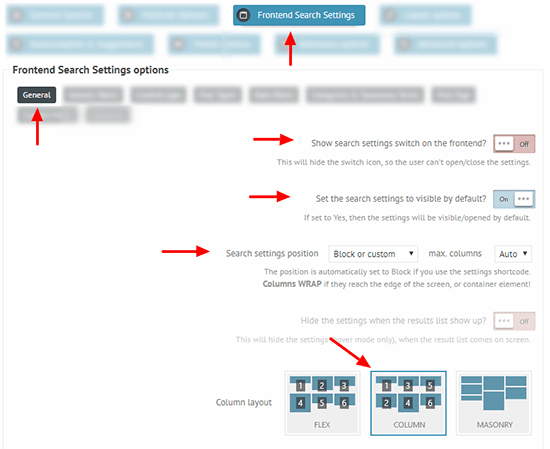
Under the Frontend search settings -> General panel change the following options:
Show search settings switch on the frontend? (optional) – OFF
Set the search settings to visible by default? – ON
Search settings position – Block or Custom
Column Layout – Column
Step 4 – Event date filters
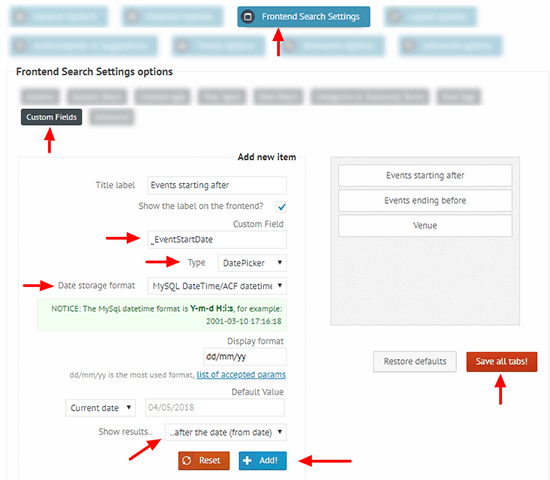
The Event Manager plugin stores the event dates in a datetime format in the _EventStartDate and _EventEndDate custom fields.
Lets make both of the date filters under the Frontend Search Settings -> Custom Fields panel. Use the screenshots below as reference on how to create them.
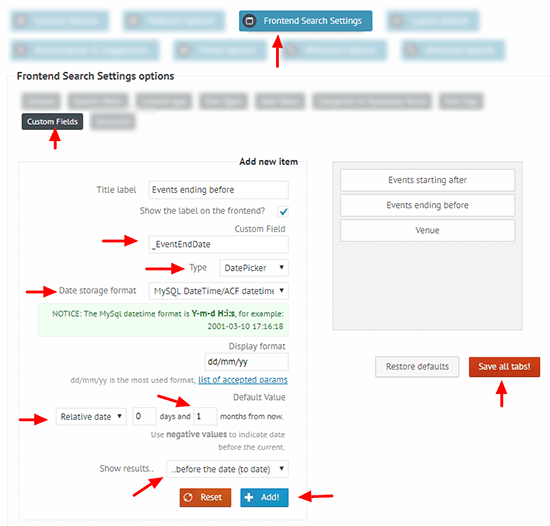
Events ending before filter configuration
For more information about custom field filter, please check the Custom field filters documentation.
Step 5 – Venue filter (optional, difficult)
The plugin stores the Venue IDs in the _EventVenueID custom field. The Venues itself are custom post types, and this field refers to them. Therefore the Venue IDs and names have to be manually entered to the filter, but first we need to find the Venue ID, Name pairs.
Finding the Venue IDs
Open up your notepad, or grab a piece of paper, and open up the Events -> Venues submenu.
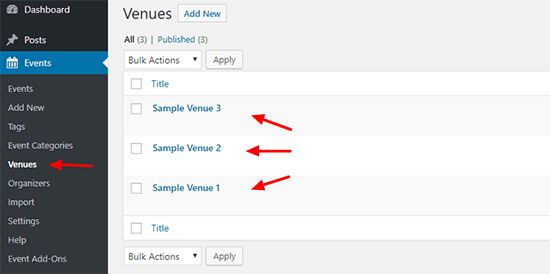
Click on each Venue one-by-one. The Venue ID well be visible in the browser address bar after the post= query argument.
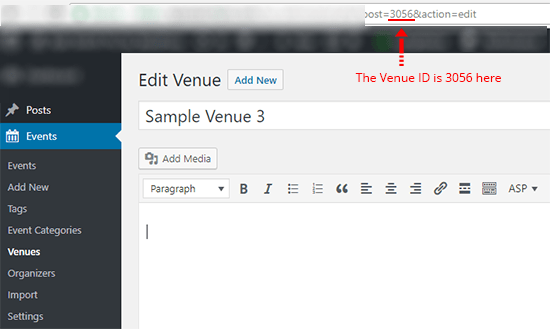
Take a note of the IDs and the Venue names. In the demo the venue IDs were 3048, 3051 and 3056. Based on this information it is now possible to construct the filter.
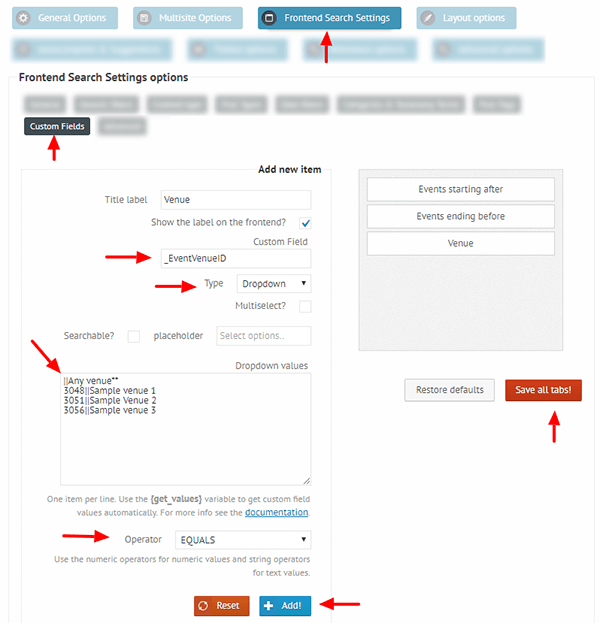
For more information about custom field filter, please check the Custom field filters documentation.
Step 6 – Event Category filter
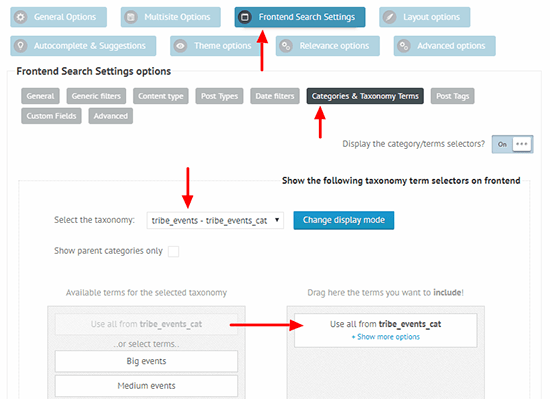
The Event Category is a taxonomy, so it is time to create a taxonomy term filter as well. Go to the Frontend Search Settings -> Categories & Taxonomy Terms panel and choose the tribes_event – tribe_events_cat taxonomy, then drag the ‘Use all..’ option to use all of them.
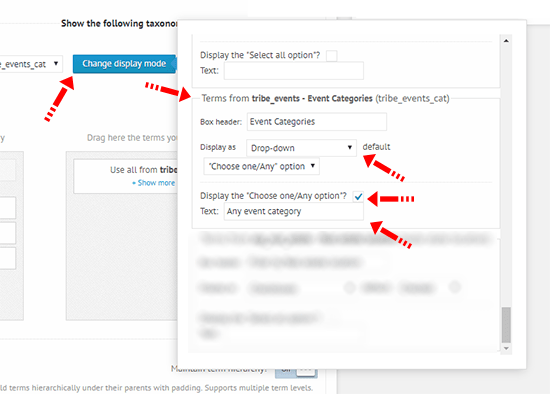
Then, click the Change display mode button, scroll to the tribe_events_cat taxonomy, and change the display mode to dropdown. You can also define the ‘Choose all/any’ option while there.
Step 7 – Date in results content
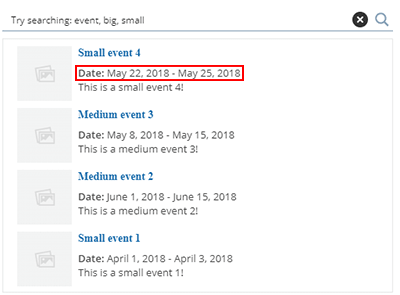
Under the Advanced Options -> Content panel, look for the Advanced Description Field option.
This field can be used to display custom field values within the results content, using the {field_name} syntax. For more detailed intofmation, please check the Advanced Title and Description field Documentation.
Enter this value there to have the exact same layout as the demo:
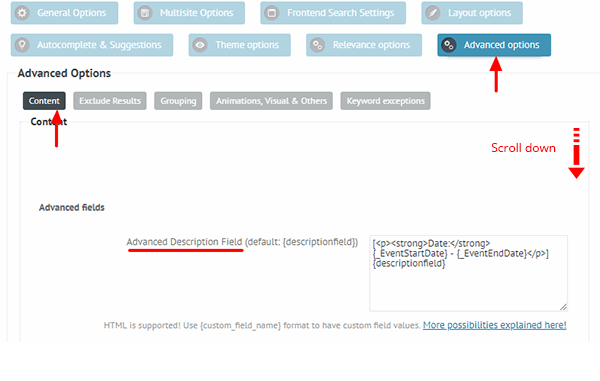
That is it. After saving the options and placing the search shortcode somewhere on your site, you should be seeing the same search layout as seen on the demo page.
Last updated